Difference between revisions of "Help:Images"
(→Height parameter) |
|||
| (4 intermediate revisions by the same user not shown) | |||
| Line 89: | Line 89: | ||
<pre> | <pre> | ||
{{Image | {{Image | ||
| + | |position= center | ||
|margin = 0.4em auto 0.4em auto | |margin = 0.4em auto 0.4em auto | ||
|width = 250 | |width = 250 | ||
| Line 101: | Line 102: | ||
which renders | which renders | ||
{{Image | {{Image | ||
| + | |position= center | ||
|margin = 0.4em auto 0.4em auto | |margin = 0.4em auto 0.4em auto | ||
|width = 250 | |width = 250 | ||
| Line 227: | Line 229: | ||
=== Height parameter === | === Height parameter === | ||
| − | If you wish to align more than one image next to each other and would like to make sure that each image is the same height you can make use of the height parameter. Using this property requires you '''omit the width''' parameter form the template. | + | If you wish to align more than one image next to each other and would like to make sure that each image is the same height you can make use of the height parameter. Using this property requires you '''omit the width''' parameter form the template. This parameter only works for external and VLIZ images, it '''does not work in combination with the wikiimage parameter'''! |
For example the code | For example the code | ||
| Line 303: | Line 305: | ||
<br style="clear:both;"/> | <br style="clear:both;"/> | ||
| + | |||
| + | === add a frame === | ||
| + | It's possible to add a frame to the external and VLIZ picture gallery images. To add the default frame you can use the code | ||
| + | |||
| + | <pre> | ||
| + | {{Image | ||
| + | |position = left | ||
| + | |margin = 5px 5px 5px 5px | ||
| + | |vlizpicid= 25165 | ||
| + | |captionposition = left | ||
| + | |fontsize = 80 | ||
| + | |caption = auteur: [http://www.vliz.be/wetenschatten/beeldbank.php?album=1218&pic=25165 E. Sacré in De Zuttere (1909)] | ||
| + | |hover = De vismijn te Oostende. (De Zuttere 1909) | ||
| + | |link = http://www.vliz.be/wetenschatten/beeldbank.php?album=1218&pic=25165 | ||
| + | |height = 200 | ||
| + | frame =1 | ||
| + | }} | ||
| + | </pre> | ||
| + | |||
| + | Which renders | ||
| + | |||
| + | {{Image | ||
| + | |position = left | ||
| + | |margin = 5px 5px 5px 5px | ||
| + | |vlizpicid= 25165 | ||
| + | |captionposition = left | ||
| + | |fontsize = 80 | ||
| + | |caption = auteur: [http://www.vliz.be/wetenschatten/beeldbank.php?album=1218&pic=25165 E. Sacré in De Zuttere (1909)] | ||
| + | |hover = De vismijn te Oostende. (De Zuttere 1909) | ||
| + | |link = http://www.vliz.be/wetenschatten/beeldbank.php?album=1218&pic=25165 | ||
| + | |height = 200 | ||
| + | |frame =1}} | ||
| + | |||
| + | <br style ="clear:both"/> | ||
| + | There are 3 optional parameters to customize this frame: | ||
| + | |||
| + | * frame: Add the name of the template you wish to use. Available names are 1 (templatefor Historical fisheries in Belgium) and custom. More info on this see http://www.coastalwiki.org/wiki/Template:Image/frame/ | ||
| + | * frameborder: This parameter used in combination with template custom can be used to set the thickness and color of the frame. To use frames of different colors you can use [http://www.w3schools.com/colors/colors_picker.asp HEX color codes]. | ||
| + | * framecolor: This parameter used in combination with template custom allows you to select different background colors you can use [http://www.w3schools.com/colors/colors_picker.asp HEX color codes]. | ||
| + | * framemargin: This parameter used in combination with template custom allows you to determin the margin between the picture and the border of the frame. | ||
| + | |||
| + | |||
| + | The following example which includes a customized frame | ||
| + | <pre> | ||
| + | {{Image | ||
| + | |position = left | ||
| + | |margin = 5px 5px 5px 5px | ||
| + | |vlizpicid= 25165 | ||
| + | |captionposition = left | ||
| + | |fontsize = 80 | ||
| + | |caption = auteur: [http://www.vliz.be/wetenschatten/beeldbank.php?album=1218&pic=25165 E. Sacré in De Zuttere (1909)] | ||
| + | |hover = De vismijn te Oostende. (De Zuttere 1909) | ||
| + | |link = http://www.vliz.be/wetenschatten/beeldbank.php?album=1218&pic=25165 | ||
| + | |height = 200 | ||
| + | |frame =custom | ||
| + | |frameborder = 3px solid #0059b3 | ||
| + | |framecolor = #00ff55 | ||
| + | |framemargin = 5 | ||
| + | }} | ||
| + | </pre> | ||
| + | would render the following | ||
| + | |||
| + | {{Image | ||
| + | |position = left | ||
| + | |margin = 5px 5px 5px 5px | ||
| + | |vlizpicid= 25165 | ||
| + | |captionposition = left | ||
| + | |fontsize = 80 | ||
| + | |caption = auteur: [http://www.vliz.be/wetenschatten/beeldbank.php?album=1218&pic=25165 E. Sacré in De Zuttere (1909)] | ||
| + | |hover = De vismijn te Oostende. (De Zuttere 1909) | ||
| + | |link = http://www.vliz.be/wetenschatten/beeldbank.php?album=1218&pic=25165 | ||
| + | |height = 200 | ||
| + | |frame =custom | ||
| + | |frameborder = 3px solid #0059b3 | ||
| + | |framecolor = #00ff55 | ||
| + | |framemargin = 5 | ||
| + | }} | ||
| + | |||
| + | <br style ="clear:both"/> | ||
== Include movie from the VLIZ fotogalerij == | == Include movie from the VLIZ fotogalerij == | ||
Latest revision as of 12:54, 26 August 2016
The following page describes how to include images in the Coastal Wiki.
There are 3 options available to show images in the wiki. There is also an option to show movies from the VLIZ fotogalerij in the the wiki.
Contents
Link to an image uploaded directly in the wiki
When you upload an image to the wiki using the upload file tool please make sure you:
- do not upload any copyright protected materials
- mention the author credits both in the file page where the image is stored as on the pages where you include the image.
- if useful you can provide a description of the image on its file page
using the thumbnail tool
Inserting an image (image command):
[[Image:filename.jpg|thumb|right|250px|Figure 1: CaptionText]]
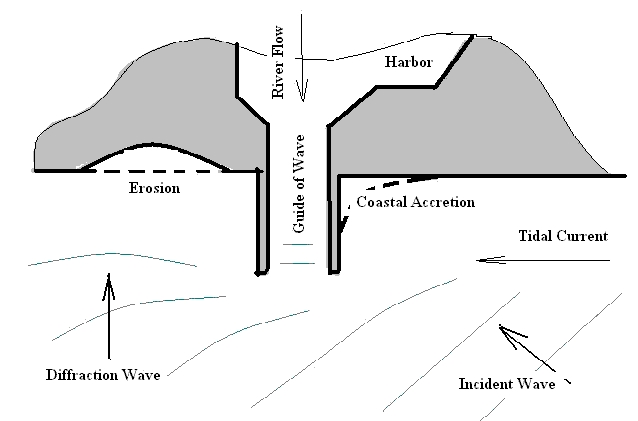
this shows
This means that a thumbnail of the image is inserted at righthand side, with a size of 250px, with a caption. Instead of placing images at righthand side of the text it is also possible to place them at the lefthand side (“left”) in the centre (“centre”). It is also possible to align no text to the pictures by using “none”.
 [[Image:filename.jpg|thumb|left|250px|Figure 1]]
 [[Image:filename.jpg|thumb|none|250px|Figure 2]]
When you want to align two images horizontally, align the first image “left” and the other image “none”. To prevent subsequent text from being places alongside the images, include the line
<br style="clear:both;"/>
If you want to align more than two images, it may be useful to place them in a table. To create a table with more than two pictures, use:
 {|
 | [[Image:File.jpg|thumb|250px|Figure 1]]
 | [[Image:File.jpg|thumb|250px|Figure 2]]
 | [[Image:File.jpg|thumb|250px|Figure 3]]
 |}
Custom layout
In some cases the tumbnails are not compatible with the layout you envision for your page. You do not need to use the tumbnail and can use caption instead
e.g.
[[Image:Figure_1.jpg|caption|right|250px|]]
renders
You may which to add a description and or author credits. For this purpose a few custom options were developed The following code
{{Image
|position = right
|margin = 5px 5px 5px 5px
|width = 250
|wikiimage = Figure_1.jpg
|captionposition = right
|fontsize = 80
|caption = Foto: Credits
|link = http://www.coastalwiki.org/wiki/File:Figure_1.jpg
}}
Parameters:
- "{{Image" calls up the template
- Position: "left" or "right"
- margin: determines the margin between your image and the text. The first value is the margin between the image and the text (or images) above it. The second to the right, the third below and the fourth value the margin between the image and the text (or images) to the left of it.
- width: insert the width in px
- wikiimage : provide the name of the wikipage storing the image (not the complete url)
- captionposition: left, right or center
- fontsize: in percentage relative to the normal font-size
- caption: the caption displayed below the image
- link: an URL link added to the image
which shows the same but with a small caption:
If you wish to position just the single image in the center of the page you can use the following code:
{{Image
|position= center
|margin = 0.4em auto 0.4em auto
|width = 250
|wikiimage = Figure_1.jpg
|captionposition = center
|fontsize = 80
|caption = Foto: Credits
|link = http://www.coastalwiki.org/wiki/File:Figure_1.jpg
}}
which renders
linking to a wiki page from an image
Use the code:
[[Image:Logonietinheemsesoorten.jpg|caption|150px|center|naar de lijst|
link=Lijst_niet-inheemse_soorten_Belgisch_deel_Noordzee_en_aanpalende_estuaria]]
- naar de lijst = hover text which apears above the image
- link = provides a link to a wiki page
Include an external image
If you simply provide a link to an image, it will displayed as an image. However it's preferred to use the following format when you wish to insert external image to your wiki page. Using external links to images has the benefit that they do not need to be stored in the wiki. However if the link to the image no longer resolves at some point the wiki page will display a dead link. So you should only use use this for images for which you know they will always stay available through this link.
<img title="insert text" src="http://www.coastalwiki.org/w/images/1/1e/Figure_1.jpg" style="width: 350px"/>
shows

- where the link provided after src refers to the image.
- you have a width component
- the title component is responsible for the text you see when you hover with your mouse over the image.
If you need a caption you can use the same code as demonstrated above.
{{Image
|position = right
|margin = 5px 5px 5px 5px
|width = 250
|source= http://www.coastalwiki.org/w/images/1/1e/Figure_1.jpg
|captionposition = right
|fontsize = 80
|caption = Foto: Credits
|hover = insert text
|link = http://www.coastalwiki.org/wiki/File:Figure_1.jpg
}}
shows:
Parameters:
- "{{Image" calls up the template
- Position: "left" or "right"
- margin: determines the margin between your image and the text. The first value is the margin between the image and the text (or images) above it. The second to the right, the third below and the fourth value the margin between the image and the text (or images) to the left of it. To position an image in the center of a page use "5px auto 5px auto", where 5px is the distance between the top and bottom of the image and the rest of the page
- width: insert the width in px
- source: provide the url storing the image.
- captionposition: left, right or center
- fontsize: in percentage relative to the normal font-size
- caption: the caption displayed below the image
- hover: the text you would like to have displayed upon hovering above the image
- link: an URL link added to the image
Include an image from the VLIZ fotogalerij
For images from the VLIZ picture galery use the following format
{{Image
|position = right
|margin = 5px 5px 5px 5px
|width = 250
|vlizpicid=11482
|captionposition = right
|fontsize = 80
|caption = Foto: VLIZ (Coppieters)
|hover = View of the galleries of Oostende. (04.07.07)
|link=http://www.vliz.be/en/multimedia/belgian-coast?pic=11482
}}
Parameters:
- "{{Image" calls up the template
- Position: "left" or "right"
- margin: determines the margin between your image and the text. The first value is the margin between the image and the text (or images) above it. The second to the right, the third below and the fourth value the margin between the image and the text (or images) to the left of it. To position an image in the center of a page use "5px auto 5px auto", where 5px is the distance between the top and bottom of the image and the rest of the page
- width: insert the width in px
- vlizpicid: the id of the image in the VLIZ picture gallery
- captionposition: left, right or center
- fontsize: in percentage relative to the normal font-size
- caption: the caption displayed below the image
- hover: the text you would like to have displayed upon hovering above the image
- link: an URL link added to the image
this renders
Height parameter
If you wish to align more than one image next to each other and would like to make sure that each image is the same height you can make use of the height parameter. Using this property requires you omit the width parameter form the template. This parameter only works for external and VLIZ images, it does not work in combination with the wikiimage parameter!
For example the code
{{Image
|position = left
|margin = 5px 5px 5px 5px
|vlizpicid=11482
|captionposition = right
|fontsize = 80
|caption = Foto: VLIZ (Coppieters)
|hover = View of the galleries of Oostende. (04.07.07)
|link=http://www.vliz.be/en/multimedia/belgian-coast?pic=11482
|height= 200
}}
{{Image
|position = left
|margin = 5px 5px 5px 5px
|source= http://www.coastalwiki.org/w/images/1/1e/Figure_1.jpg
|captionposition = right
|fontsize = 80
|caption = Foto: Credits
|hover = insert text
|link = http://www.coastalwiki.org/wiki/File:Figure_1.jpg
|height= 200
}}
{{Image
|position = left
|margin = 5px 5px 5px 5px
|vlizpicid= 25165
|captionposition = left
|fontsize = 80
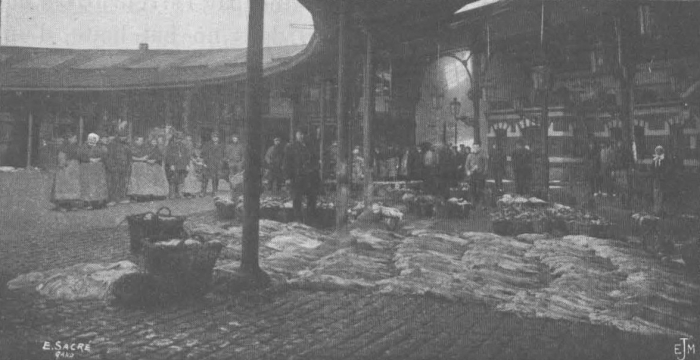
|caption = auteur: [http://www.vliz.be/wetenschatten/beeldbank.php?album=1218&pic=25165 E. Sacré in De Zuttere (1909)]
|hover = De vismijn te Oostende. (De Zuttere 1909)
|link = http://www.vliz.be/wetenschatten/beeldbank.php?album=1218&pic=25165
|height = 200
}}
renders 3 images aligned with the same height.

add a frame
It's possible to add a frame to the external and VLIZ picture gallery images. To add the default frame you can use the code
{{Image
|position = left
|margin = 5px 5px 5px 5px
|vlizpicid= 25165
|captionposition = left
|fontsize = 80
|caption = auteur: [http://www.vliz.be/wetenschatten/beeldbank.php?album=1218&pic=25165 E. Sacré in De Zuttere (1909)]
|hover = De vismijn te Oostende. (De Zuttere 1909)
|link = http://www.vliz.be/wetenschatten/beeldbank.php?album=1218&pic=25165
|height = 200
frame =1
}}
Which renders

There are 3 optional parameters to customize this frame:
- frame: Add the name of the template you wish to use. Available names are 1 (templatefor Historical fisheries in Belgium) and custom. More info on this see http://www.coastalwiki.org/wiki/Template:Image/frame/
- frameborder: This parameter used in combination with template custom can be used to set the thickness and color of the frame. To use frames of different colors you can use HEX color codes.
- framecolor: This parameter used in combination with template custom allows you to select different background colors you can use HEX color codes.
- framemargin: This parameter used in combination with template custom allows you to determin the margin between the picture and the border of the frame.
The following example which includes a customized frame
{{Image
|position = left
|margin = 5px 5px 5px 5px
|vlizpicid= 25165
|captionposition = left
|fontsize = 80
|caption = auteur: [http://www.vliz.be/wetenschatten/beeldbank.php?album=1218&pic=25165 E. Sacré in De Zuttere (1909)]
|hover = De vismijn te Oostende. (De Zuttere 1909)
|link = http://www.vliz.be/wetenschatten/beeldbank.php?album=1218&pic=25165
|height = 200
|frame =custom
|frameborder = 3px solid #0059b3
|framecolor =  #00ff55
|framemargin = 5
}}
would render the following

Include movie from the VLIZ fotogalerij
It's possible to include a movies directly from the VLIZ fotogalerij. The base code for this is:
<vliz_photo_gallery pic="42836" share="1"></vliz_photo_gallery>
Where
- pic refers to the image id
- "share" is default enabled if set to 0 no social share buttons will be added

